See the presentation below, live and under that, the link to the PowerPoint (minus fonts. Font are here.)
FOBIT 2018 - Minecraft: Education Edition

Minecraft: Education Edition with an Agent.
Minecraft: Education Edition
Whats' New, what's different and what can I do with it in my classroom?
Before we begin, there are a few prerequisites needed. See this link for Microsoft's guide. However, in short, you will need an Office365 setup at your school to qualify for the free version (free, as in, you pay for the school-wide Office 365). You can, as we did initially, get a Microsoft partner to organise copies. We paid something like $5US per seat/ login. Each login is similar to the old Mojang login at Minecraft.net. Look for a Microsoft partner in your area/ country if you don't already have one at your school. You more than likely have one already. See details here and here.
What's new in Minecraft: Education Edition ?
Well, in short, lots. It's come a long, long way since the Teacher Gaming days. The most notable are the add-ons that provide teacher classrooms controls and the coding panels.
Classroom Mode

You need the Classroom Mode add-on. Download here.
You can see all support here.
As you can see here on the right, you can see terrain, all the players on your server and the relative chat that your students are engaged in.
If we look around this screen, you can see there are other options that we used in MinecraftEDU such as the pause and home at the end of the player's names in the Player Roster.

On the right here, we see the menu for restricting player's abilities in-game.
From the three lined menu (or Burger as it's fondly called in many quarters) you get a drop-down to pause game, chat on/off, perfect weather, Mobs on/off, destructive items on/off, damage on/off, immutable world on/off and PVP on/off.
This is really handy especially if you like to play in creative mode with your classes and guide your students on how to build and co-operate in the initial stages of any build.
What's different in-game? Are there specialist blocks for Education Edition?
There are several different blocks and methods in Minecraft: Education Edition

There are, while in /worldbuilder mode (on your server and in editor of the world for your students) you can place down these items:
Camera - in-game recording can occur in creative mode with a camera. Click 'use' to place and click 'use' on the camera to take a selfie. The camera auto-follows you. In a self-timer, the camera will take snap of you and the surrounding area. This is placed in the portfolio.
Portfolio - the portfolio keeps a book-like set of pages of the recent captures from the camera. You can export the folder of images as a .zip file for later use or upload.
Three additional inventory blocks - the inventory can be extended in Education Edition with the use of three extra inventory slots. This can be toggled using '0' to access what we /give (note / to write a command) to students. The 'fixedinslot' can be sent as a command like this: /setfixedinvslot 1 camera . Where the number 1 can be changed to 2 or 3 and the object changed to something like a map or portfolios or weapons even.

Minecraft Education Edition - Compound Creator - 1 of 4 new tables in Minecraft
If you need to remove those slots? Use /clearfixedinv to remove the items. Please note that this command will clear all the slots at once, and you cannot remove a single fixed inventory slot.
No command Blocks - unfortunately there aren't any command blocks like there are/ were in the Java EDU edition. This might be a shame in some respects. Especially when you want to quickly reset a small area of your world that contains, say, chests of objects.
Allow and Deny Blocks - This is a fantastic little device when building worlds. You can guide classes towards their goals by keeping them on track and using sign posts/ chalkboards to build a story/ quest.
Chemistry (2018) - the newest addition are the four chemistry work tables ( Element Constructor, Compound Creator, Lab Table, Material Reducer). These allow students to mix, split and create education-only elements and reactions - such as adding a Helium filled balloon to a pig and making it float. See this PDF for support.
Chalkboard (slates and Posters) - These allow you more space in areas that need instruction than simple sign posts. In size order: Chalkboards, Posters and slates being the smallest.
NPC with custom commands. Easily one of my favourite elements of Education Edition. A great example of this is the Oregon Trail world. The NPCs in this world really show off the story-like feel of adventure mode.
Some additional items to think about when in your world.
- creating a 'time out area'. The Classroom Mode doesn't allow you to individually pause players for 'greifing' other player's builds. So, what I usually like to do is build a 3x3 area with 9 border blocks. The snag here, is that if you're in creative mode, then students can throw Ender Pearls into and out of the border blocks to escape. Something to keep in mind.
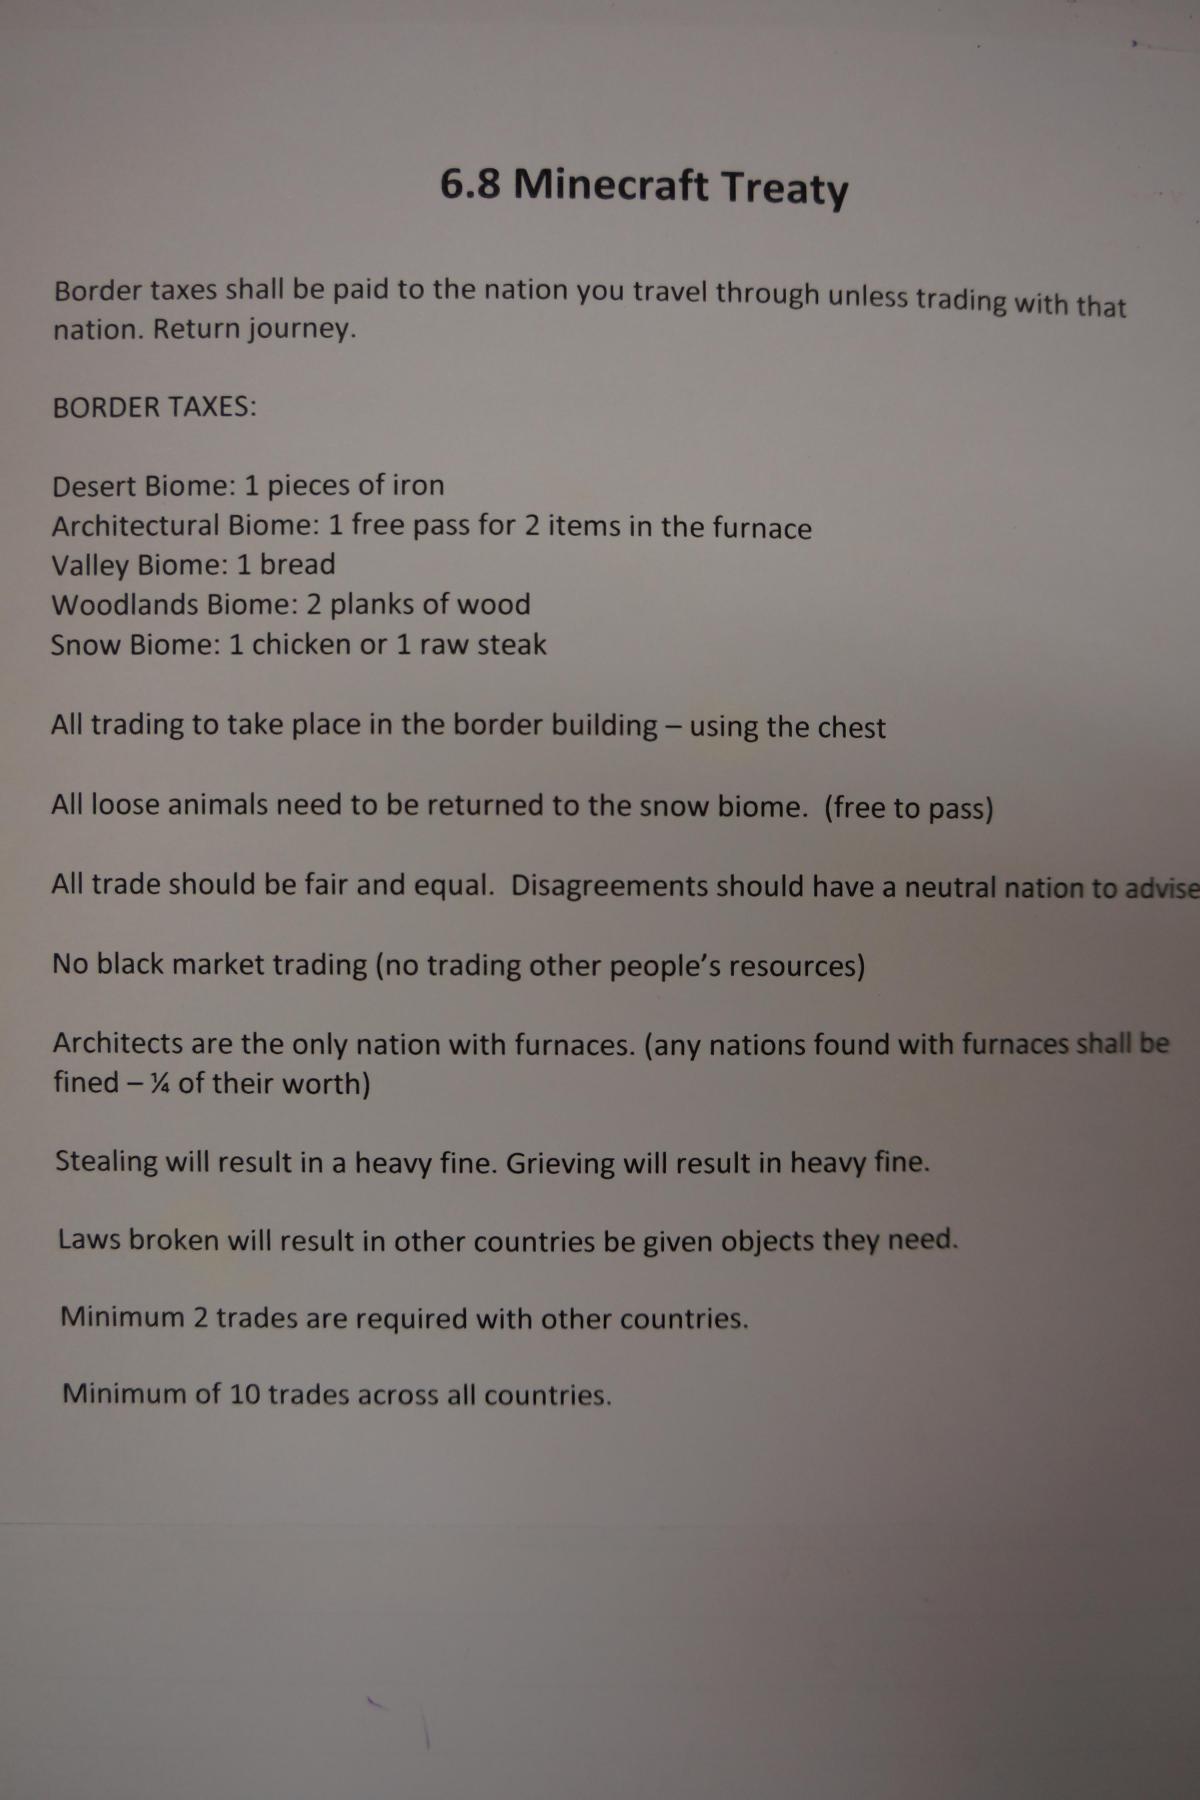
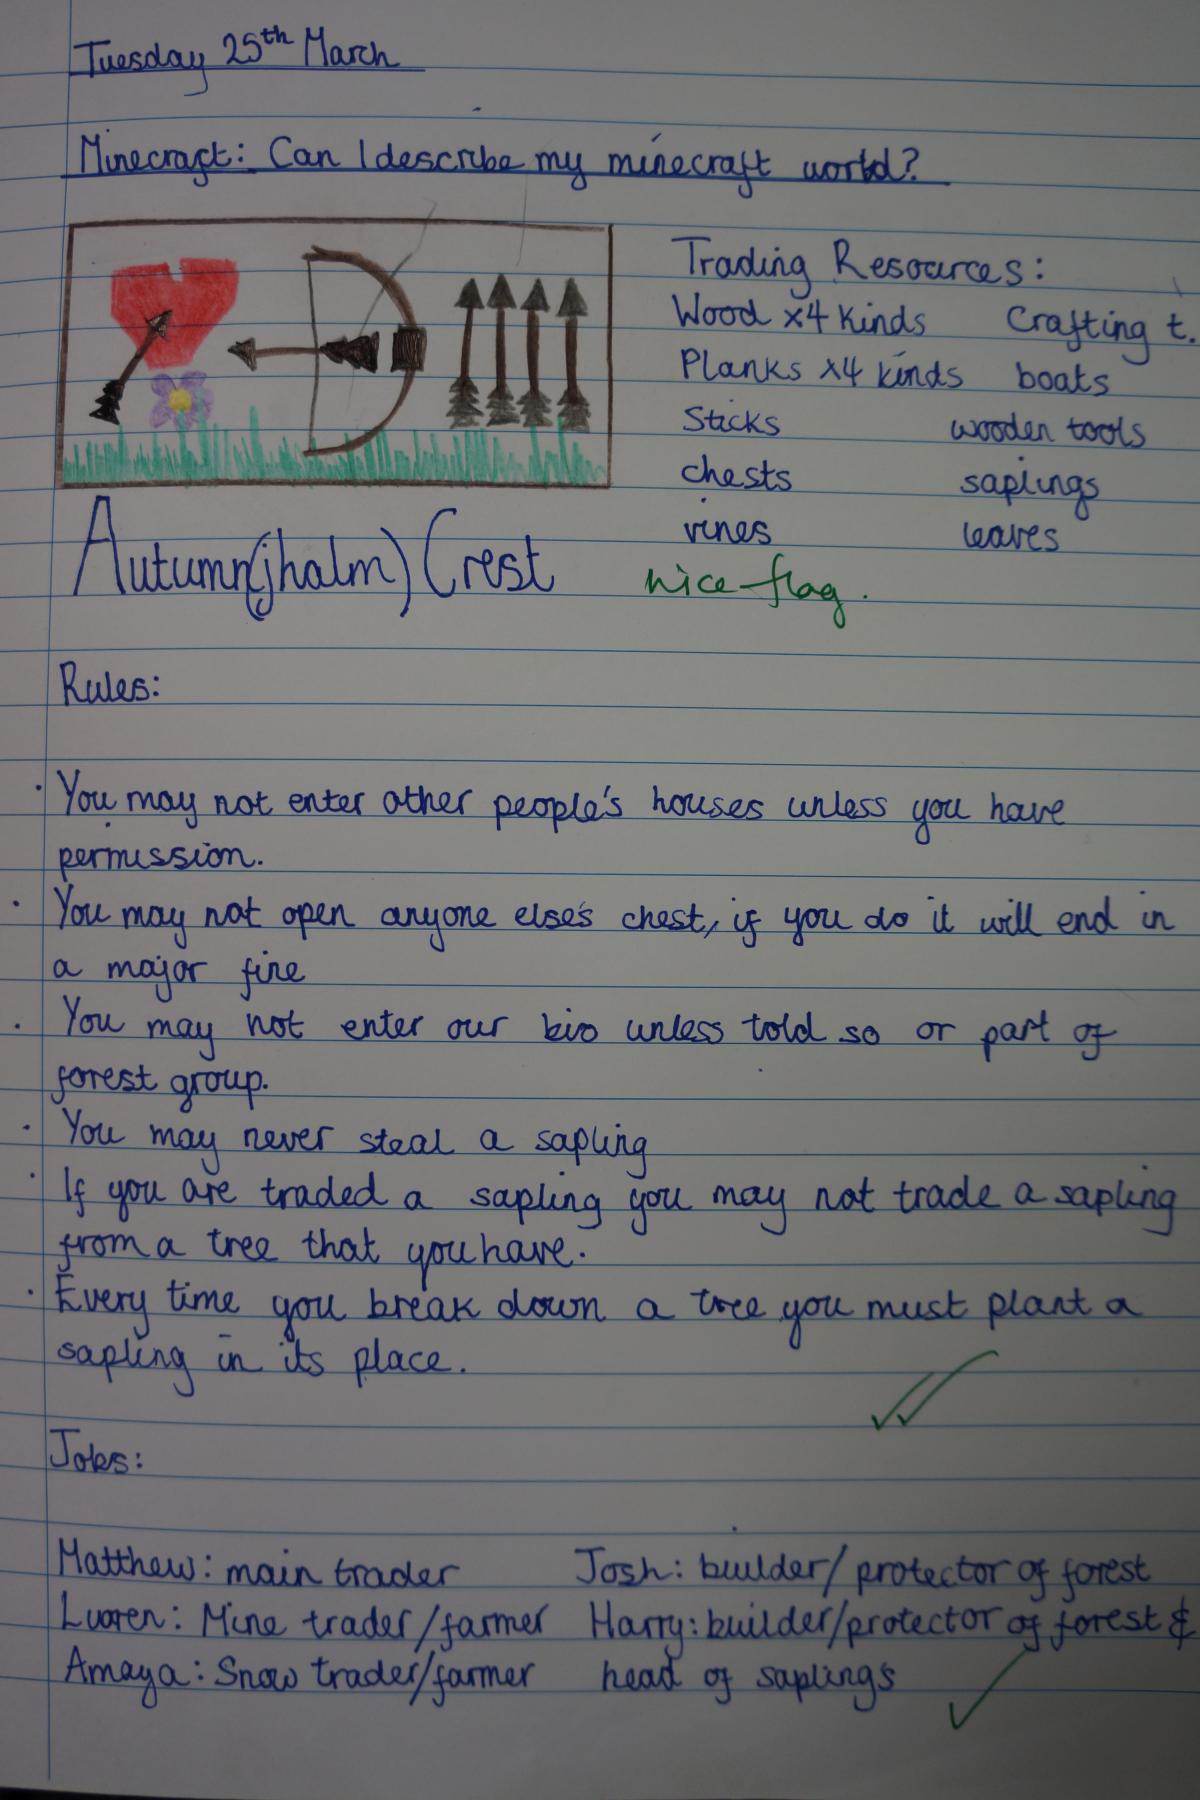
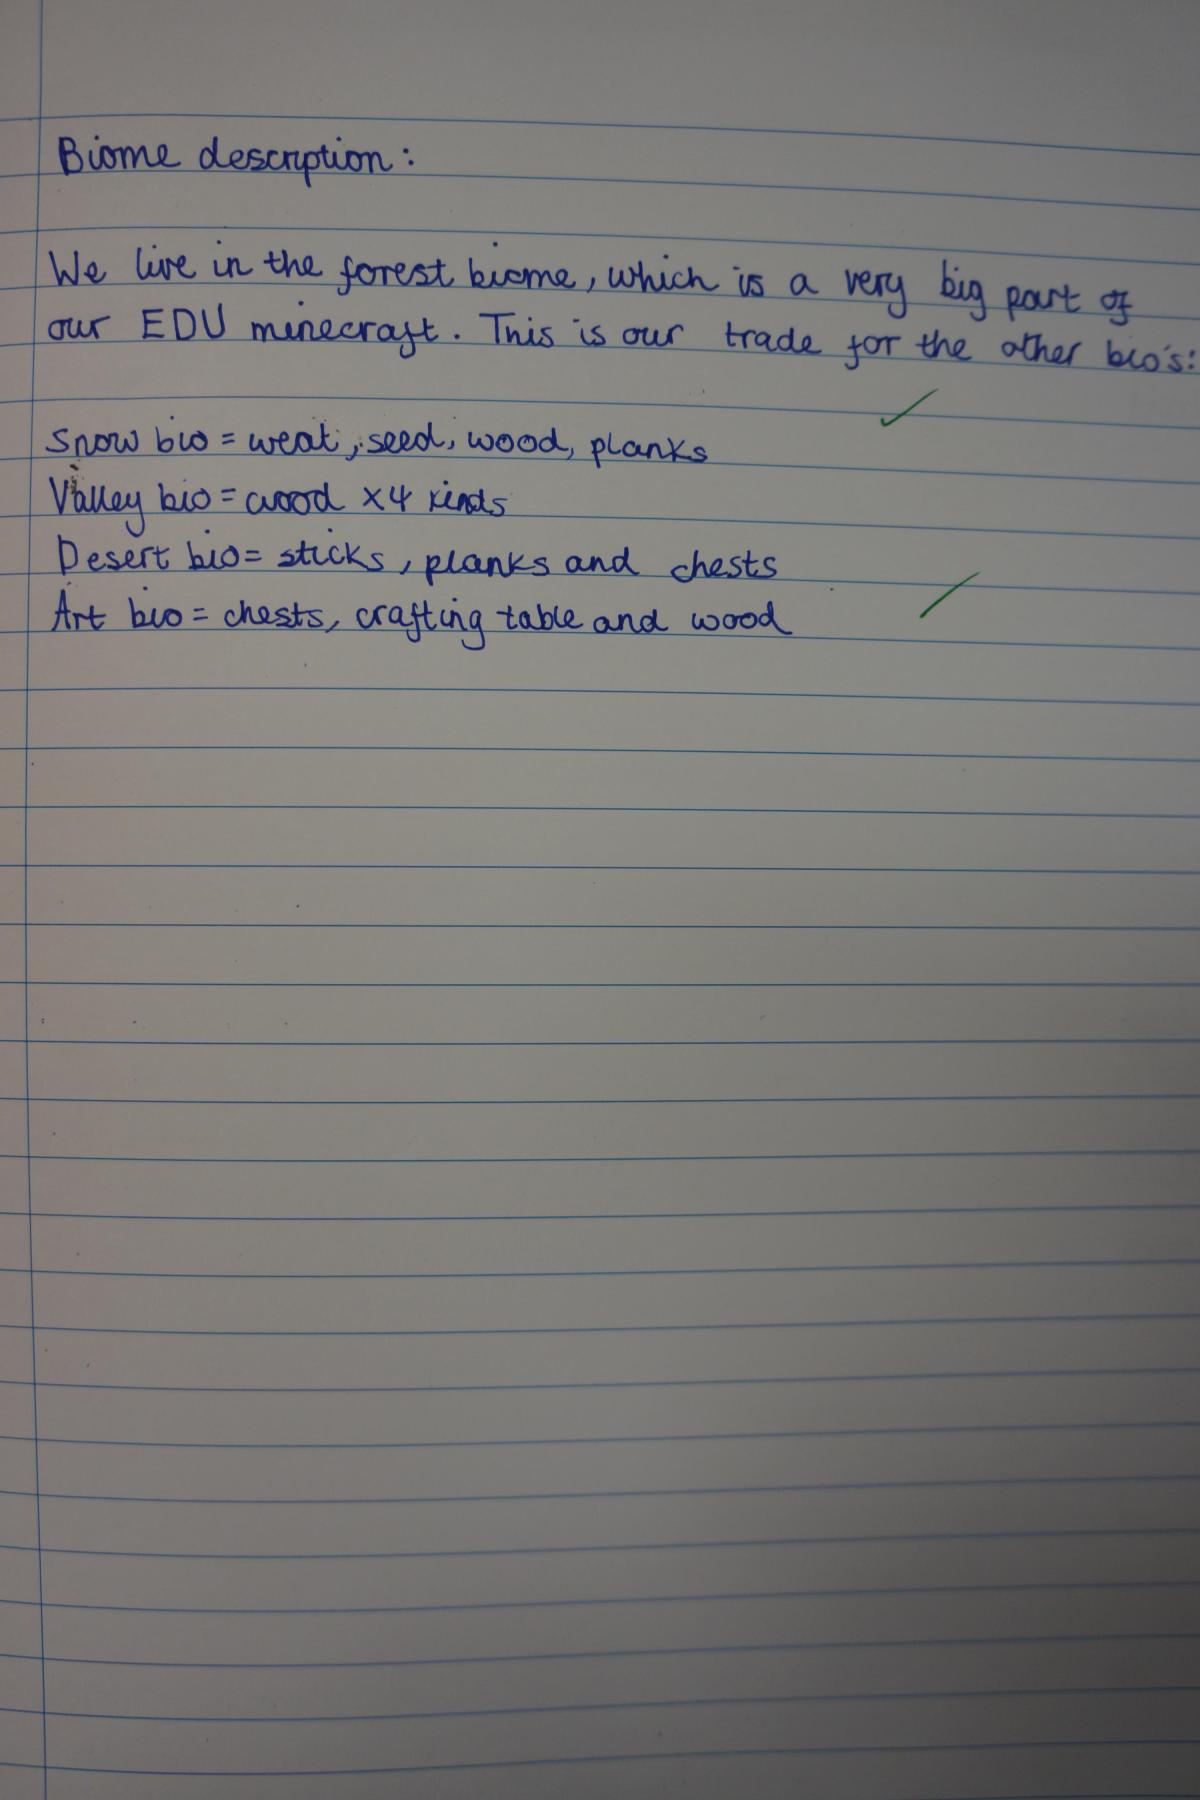
Note - ask your students to set in-game rules prior to starting. It helps no end.
Code Connection
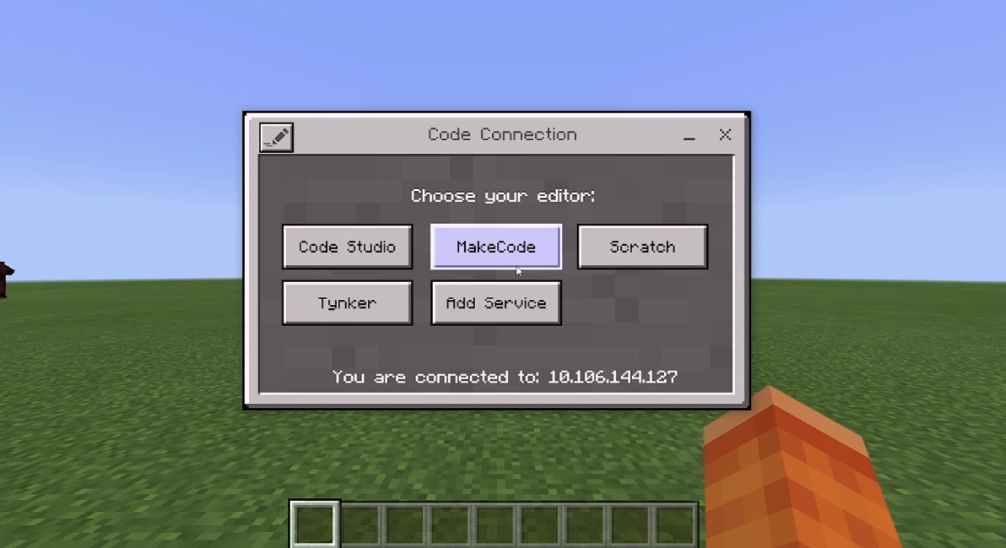
opening screen of code connection once you've made the server link
Minecraft Code Connection
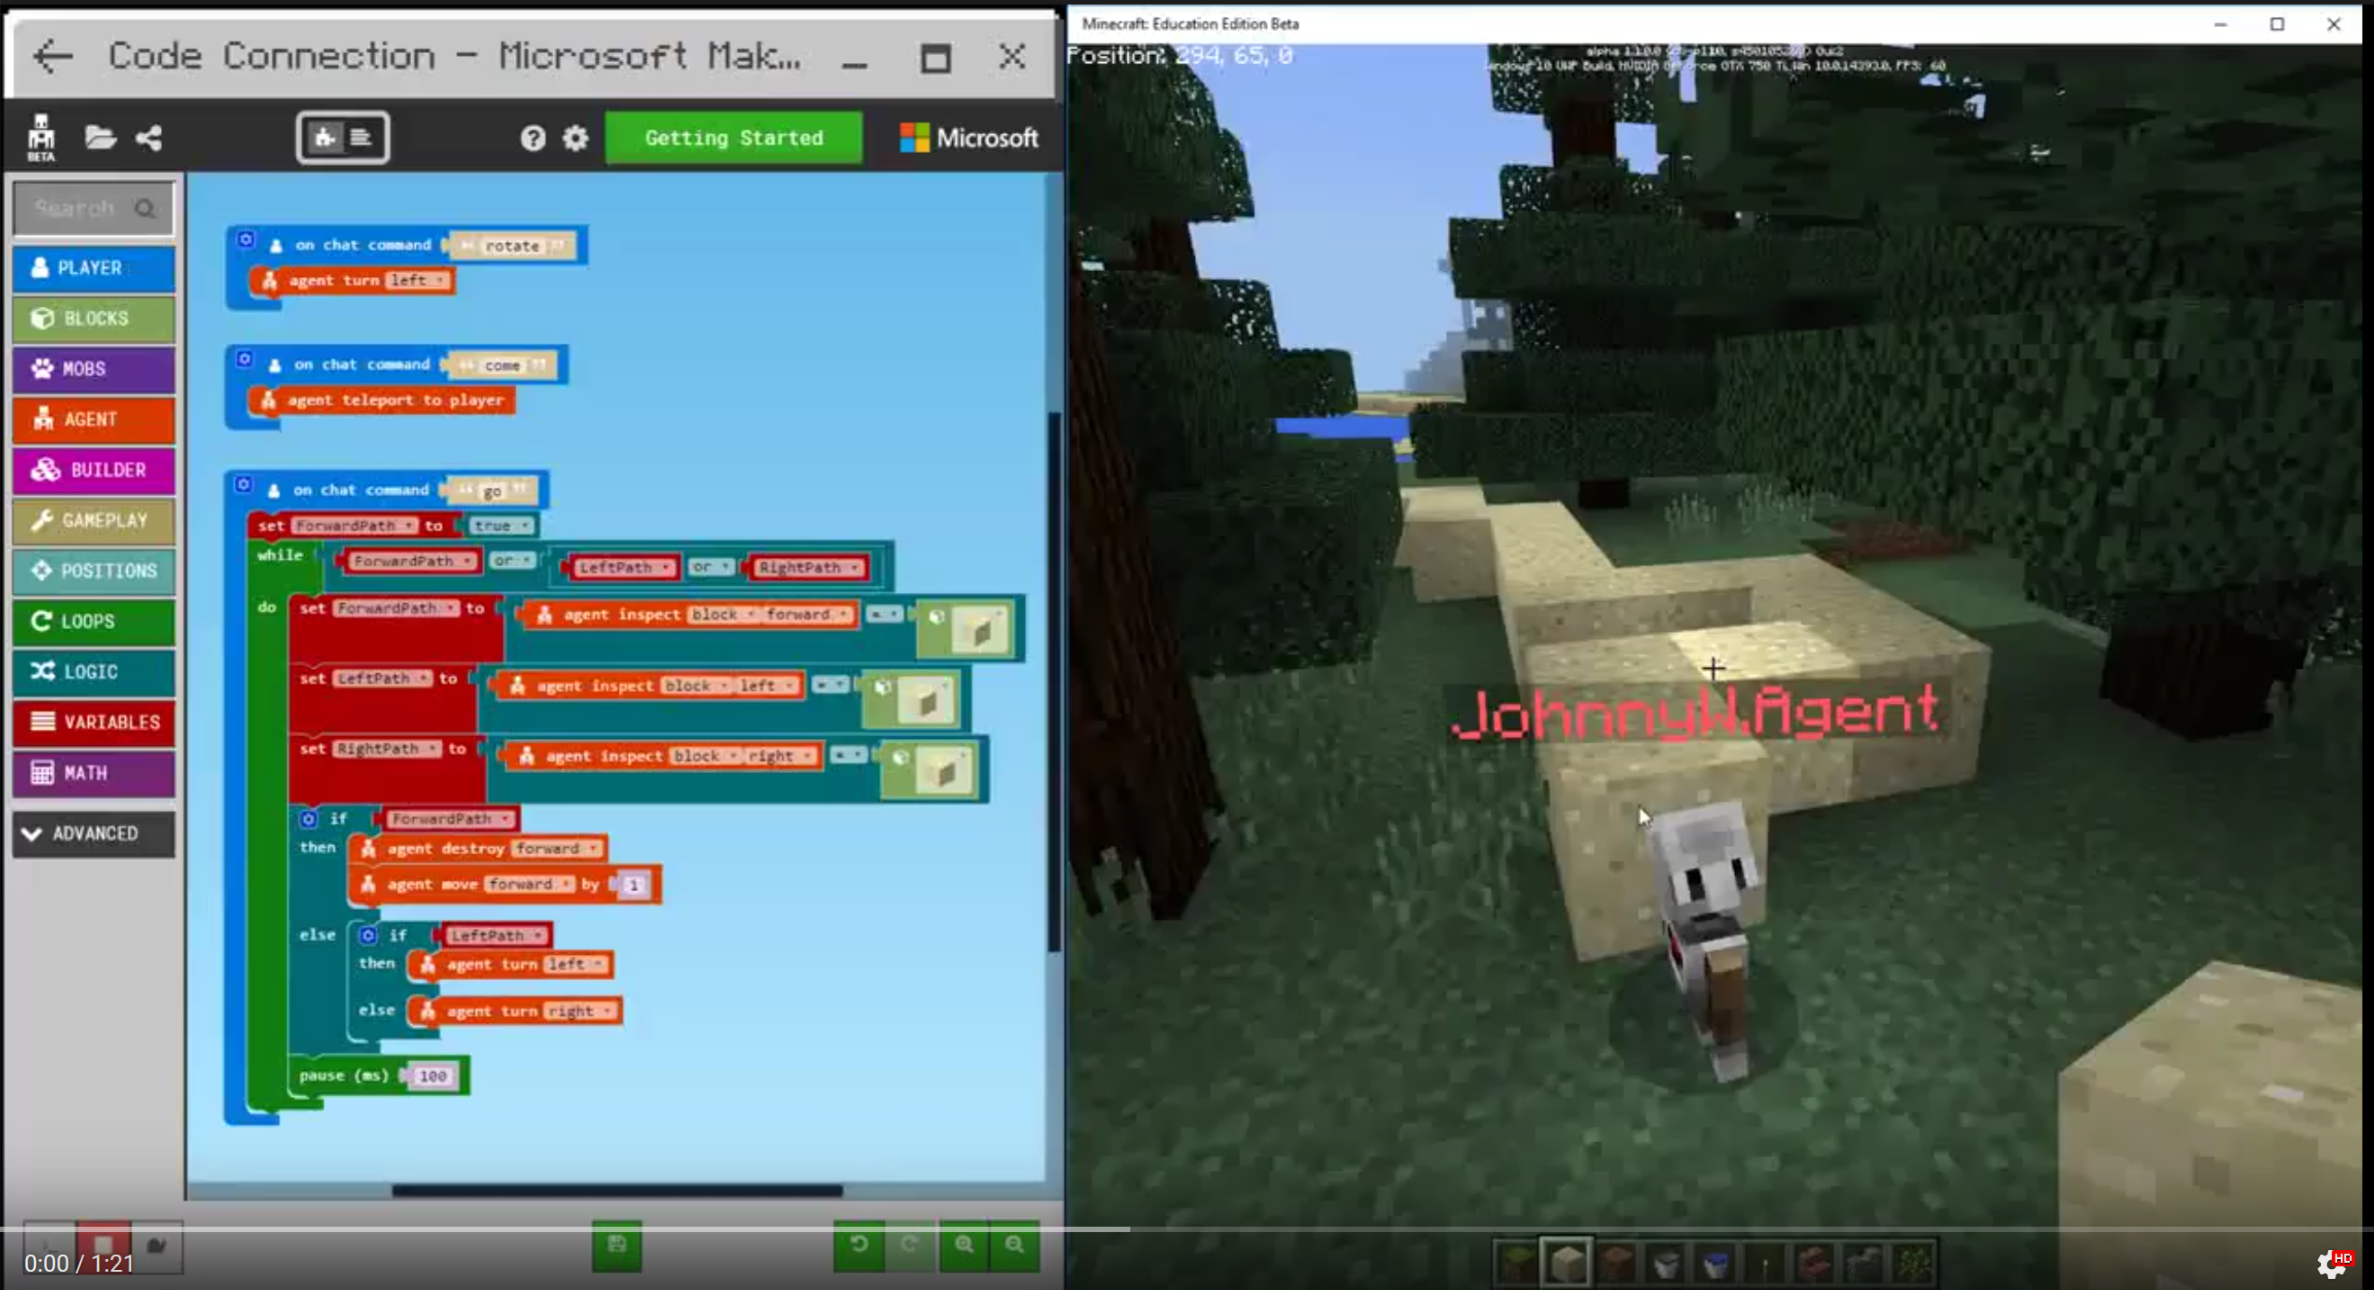
Code connection and Classroom Mode are add-ons for Education Edition. On the right here, you can see the 'Agent' in the main window looking at the camera and, on the left, you can see a Scratch-like set of blocks. While you can use Scratch (ScratchX to be fair which is the extensions section), as seen above, the image here on the right shows Microsoft's Make Code. It's arguably better as the Agents moves have a slightly better integration. Well , it would really, wouldn't it. We like Scratch however, here it might be a better choice to use Make Block your choice of command. You can also use Tynker. See here for resources.
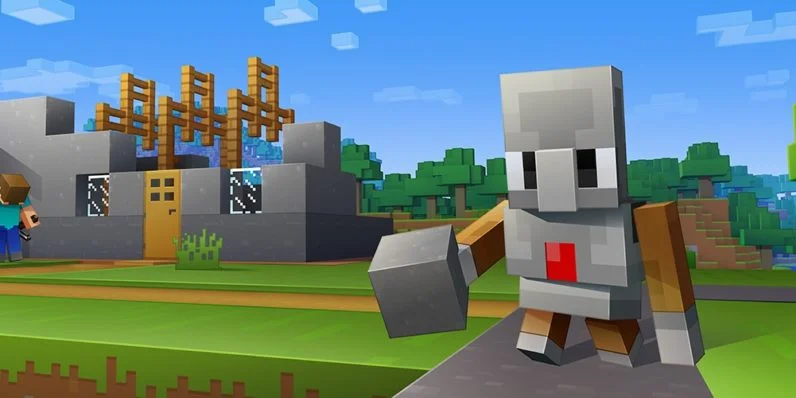
To get a flavour of how the Agents work, check out the tutorials. They're fun and very well made. Click the image below.
Start here for the guide.
See the walkthrough in the video below too to get started. Have Fun.
FOBIT 2018 Workshop Resources
The FOBIT 2018 delegate pages are here. All the worlds for download and edit are here.

Make Code Tutorials - Make it rain chickens
Sonic Pi - Making, Mixing and Live Coding Music at FOBIT 2017
March 4, 2017
“Two performances did seem to transcend the present, with artists sharing music that felt like open-source software to paths unknown. The first, Sam Aaron, played an early techno set to a small crowd, performing by coding live. His computer display, splayed naked on a giant screen, showcasedSonic Pi, the free software he invented. Before he let loose by revising lines of brackets, colons and commas, he typed:
#This is Sonic Pi…..
#I use it to teach people how to code
#everything i do tonight, i can teach a 10 year old child…..
His set – which sounded like Electric Café-era Kraftwerk, a little bit of Aphex Twin skitter and some Eighties electro – was constructed through typing and deleting lines of code. The shadowy DJ sets, knob-tweaking noise and fogbank ambient of many Moogfest performers was completely demystified and turned into simple numbers and letters that you could see in action. Dubbed “the live coding synth for everyone,” it truly seemed less like a performance and more like an invitation to code your own adventure.”
— Sam Aaron @ MoogFest 2016 via Christopher R. Weingarten Rolling Stone Magazine
Music. Code. Art. Sonic Pi is all of these.
Sonic Pi. What is it? Where can you get it? What can you do with it in your class?
Get it here: Sonic-pi.net
Sonic Pi allows you to make music with code. It's a seriously simple peice of software (to begin with) that allows you to program loops and samples all in time with one another. It also allows you to keep things simple by emulating musical scales either with midi or regular notation. The way you expeirience it should not be how we think about traditonal instruments it's way beyond a single instrument with a single range of sounds. You pick up a guitar and you pluck the strings, then you press down on the frets and the length of the string that you re-tune defines the sound that comes from the strings. This is something you can do in Sonic Pi however Sonic Pi goes way beyond this.
In a nutshell, you can mix samples, live mix samples, splice sounds, edit them, bend them, break them and reattach all while keeping each 'Live Loop' in sync. This is the big deal: it's all in sync whether you are using a BPM counter or the rhythm of the sample you're using. And, if you're making music on a Raspberry Pi then you can pretty much make an accompanying video in Minecraft. Amazing.
The session I'll be leading at Fobit 2017 is an introduction to what is possible using text to code. Sadly, we were not able to get Sam Aaron himself (@SamAaron/ @Sonic_Pi) the creator of Sonic Pi over or his counterpart who I saw live demonstrating at Bath Ruby, Xavier Riley (@XavierRiley). Alas, we tried! Even so, we have people here who are ready to run additional workshops, Sam's write-up in MagPi Sonic Pi Special Edition and attendees to produce fine, fine tunes and compete too.
The main reason I like this is that Sam and his team specifically laid out the vision for Sonic Pi that if an addition to the application was beyond the understanding of a ten year old child then it was not to be added. As a tech integrator in the primary school this is, quite literally, music to my ears. We have been after a text-based language to peel our kids away from Scratch as I feel we use Scratch to death. I also feel that there is a lot of learning that takes place in coding that really has no real goal attached and Scratch can fall into that category pretty easily. Where as Sonic Pi doesn't. In order for Sonic Pi to be successful there needs to be an instructor present to guide students towards their goal. Scratch can be a little wishy-washy at times unless there is a very specfic goal such as producing game or animation (minus that Cat or its ilk!).
So what can we do with Sonic Pi?

The beauty of Sonic Pi too is that within the application there is jargon-less support and tutorials all the way through. Heck, while I was running the session for FOBIT, Tine Pendred from Garden International School, KL tweeted Sam with praise and for support. He tweeted back with directions on which tutorial she needed to sync buffers! Now you don't get that kind of support from a lot of app support.
This session was by no means a masterclass and, when you are being watched while typing, it's rather off putting to the point where I forgot a load of syntax and my code didn't play. The competition got people motivated and the chance to win a Rapsberry Pi 3 meant people took this seriously with great results. Well to Tine who won the Pi in the end - well deserved.
The session was meant to inspire and allow teachers to take on the notion that text based programming languages are 'scary' and that we can't do it. Or, that students can't tackle text programming for similar reasons. Sonic Pi is based on a langauge called Ruby. It's a fully fledged programming language however, as you will see in Xavier's walkthrough below the accessibility of Sonic Pi is really quite low. What you do with it afterwards is where you truly become enconsed in wanting to learn more. Once you get over that hurdle of "whet the hell do I write next?" the music spurs you on and as Xavier jokes below - it's all about mood, your wants and deisres. The music pushes you, and as I said earlier about Scratch being somwhat goal-less at times, Sonic Pi drives you to create your own goals. Once you have a play, hit up a few live loops you will soon be wanting to re-create wel known tracks such as this Daft Punk re-make. If anyone wants to help me get my fix on the Out Run sound track please feel free to drop me a line.

Several people from the conference have taken this on where students are using soundtrap to collaborate and build their musical creations from there. You can hop on over here to see what Jonathan Kitchin is doing with with his classes and their soundtrap project.
Below are a few of the links I posted out including some very basic level intros from a guy named Dave Conservatoire, the most amazing Bath Ruby set and walkthrough by Xavier Riley and, finally a live set by Sam at the bottom.
Enjoy.
This video is part of a course introducing Sonic Pi (www.sonic-pi.net) to musicians. You can view the whole course in order and watch many more videos at www.daveconservatoire.org

Rocking Out In Ruby - A Playful Introduction to Sonic PI by Xavier Riley Help us caption & translate this video! http://amara.org/v/IG11/
Live Coding with Sonic Pi For more recent performances see: http://livecoding.tv/samaaron

via: http://www.binaryfestival.com/blog/introducing-sam-aaron
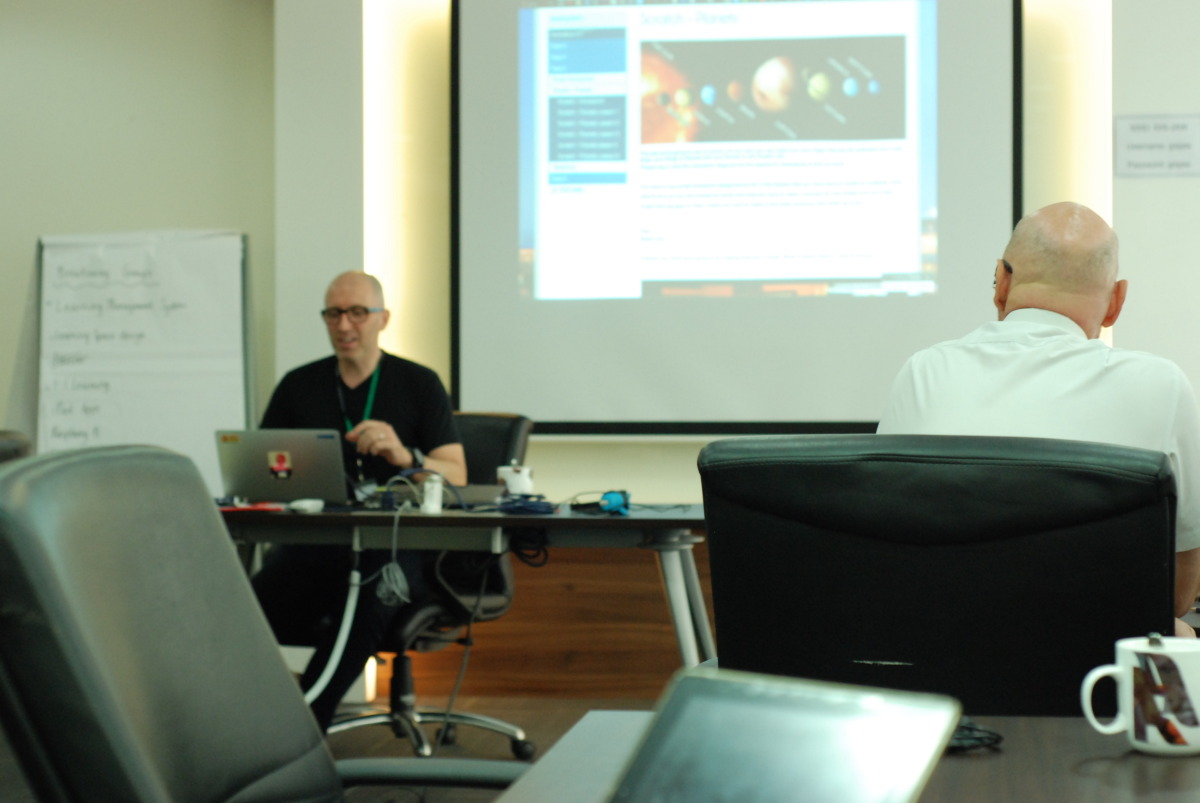
Presenting at Learning2, Bangkok
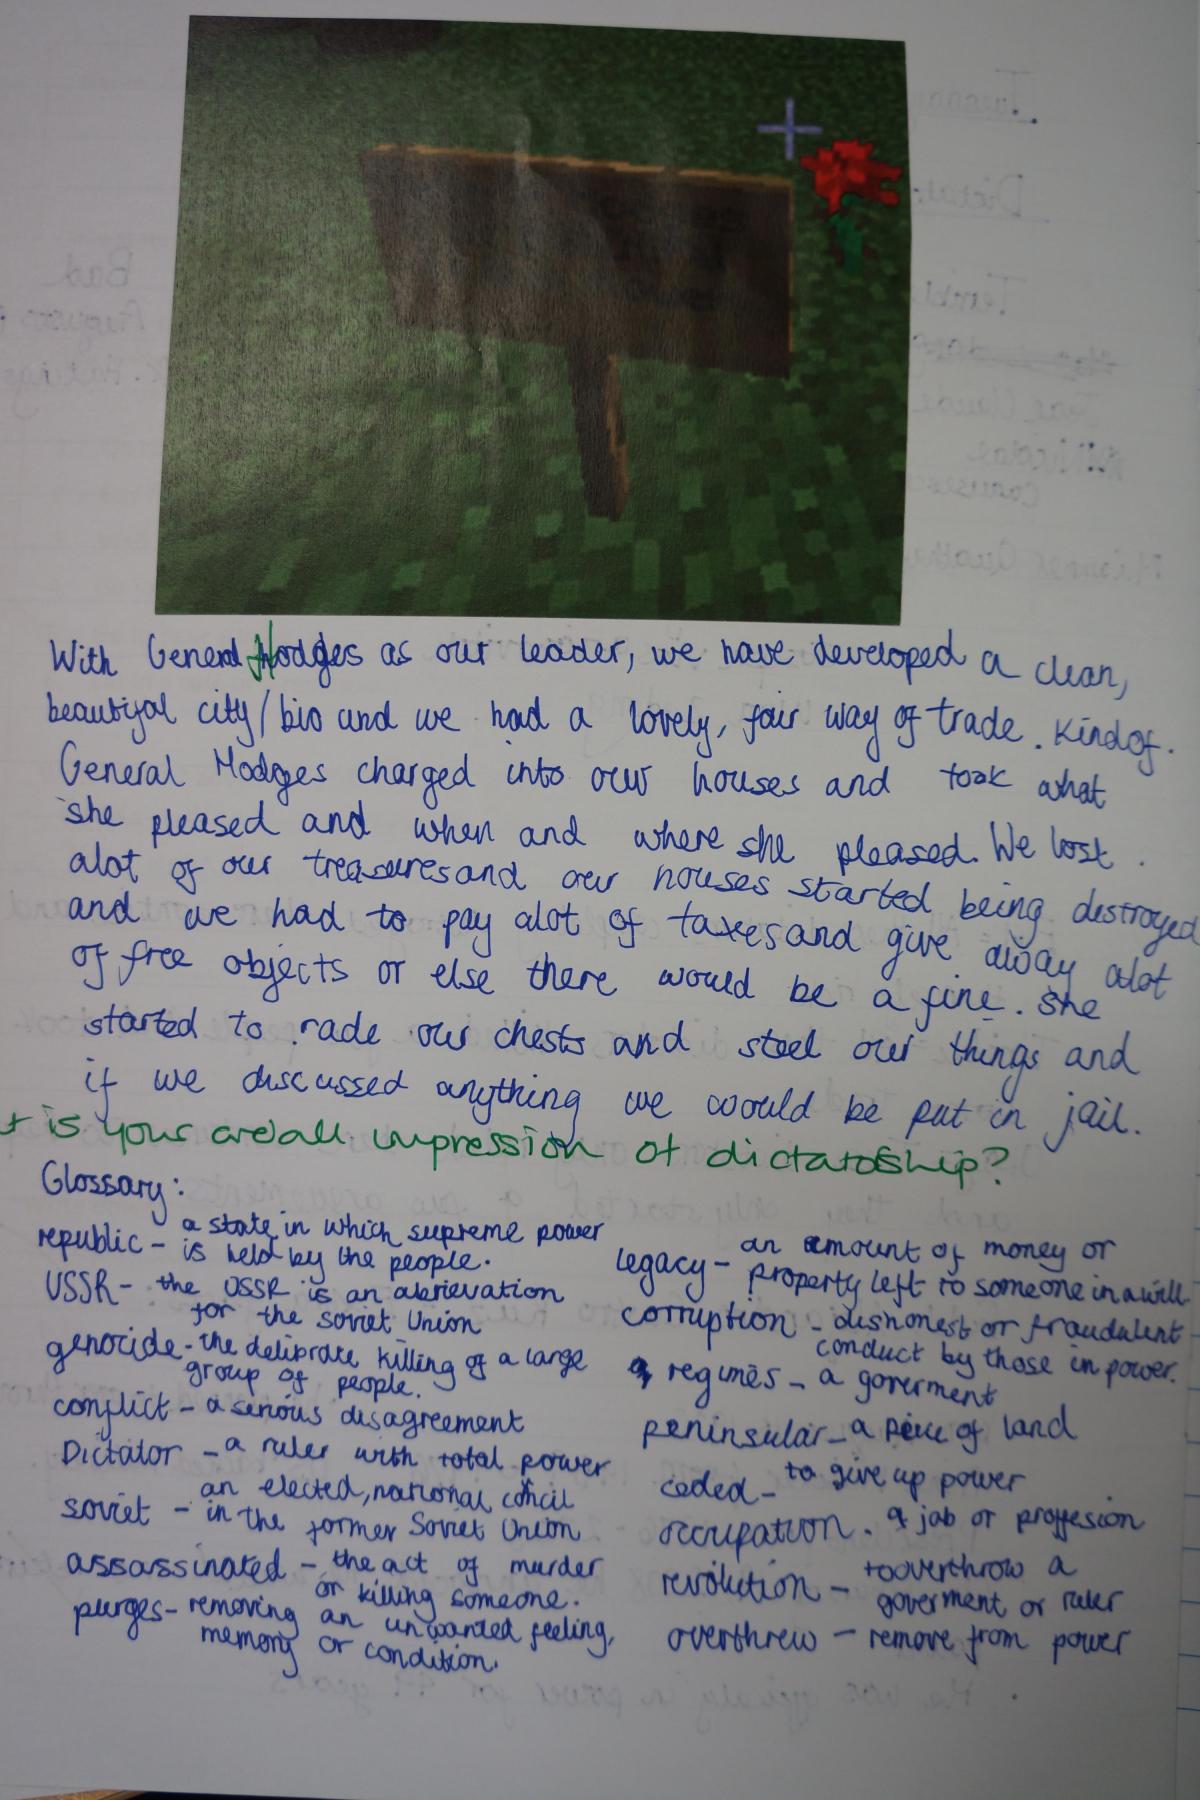
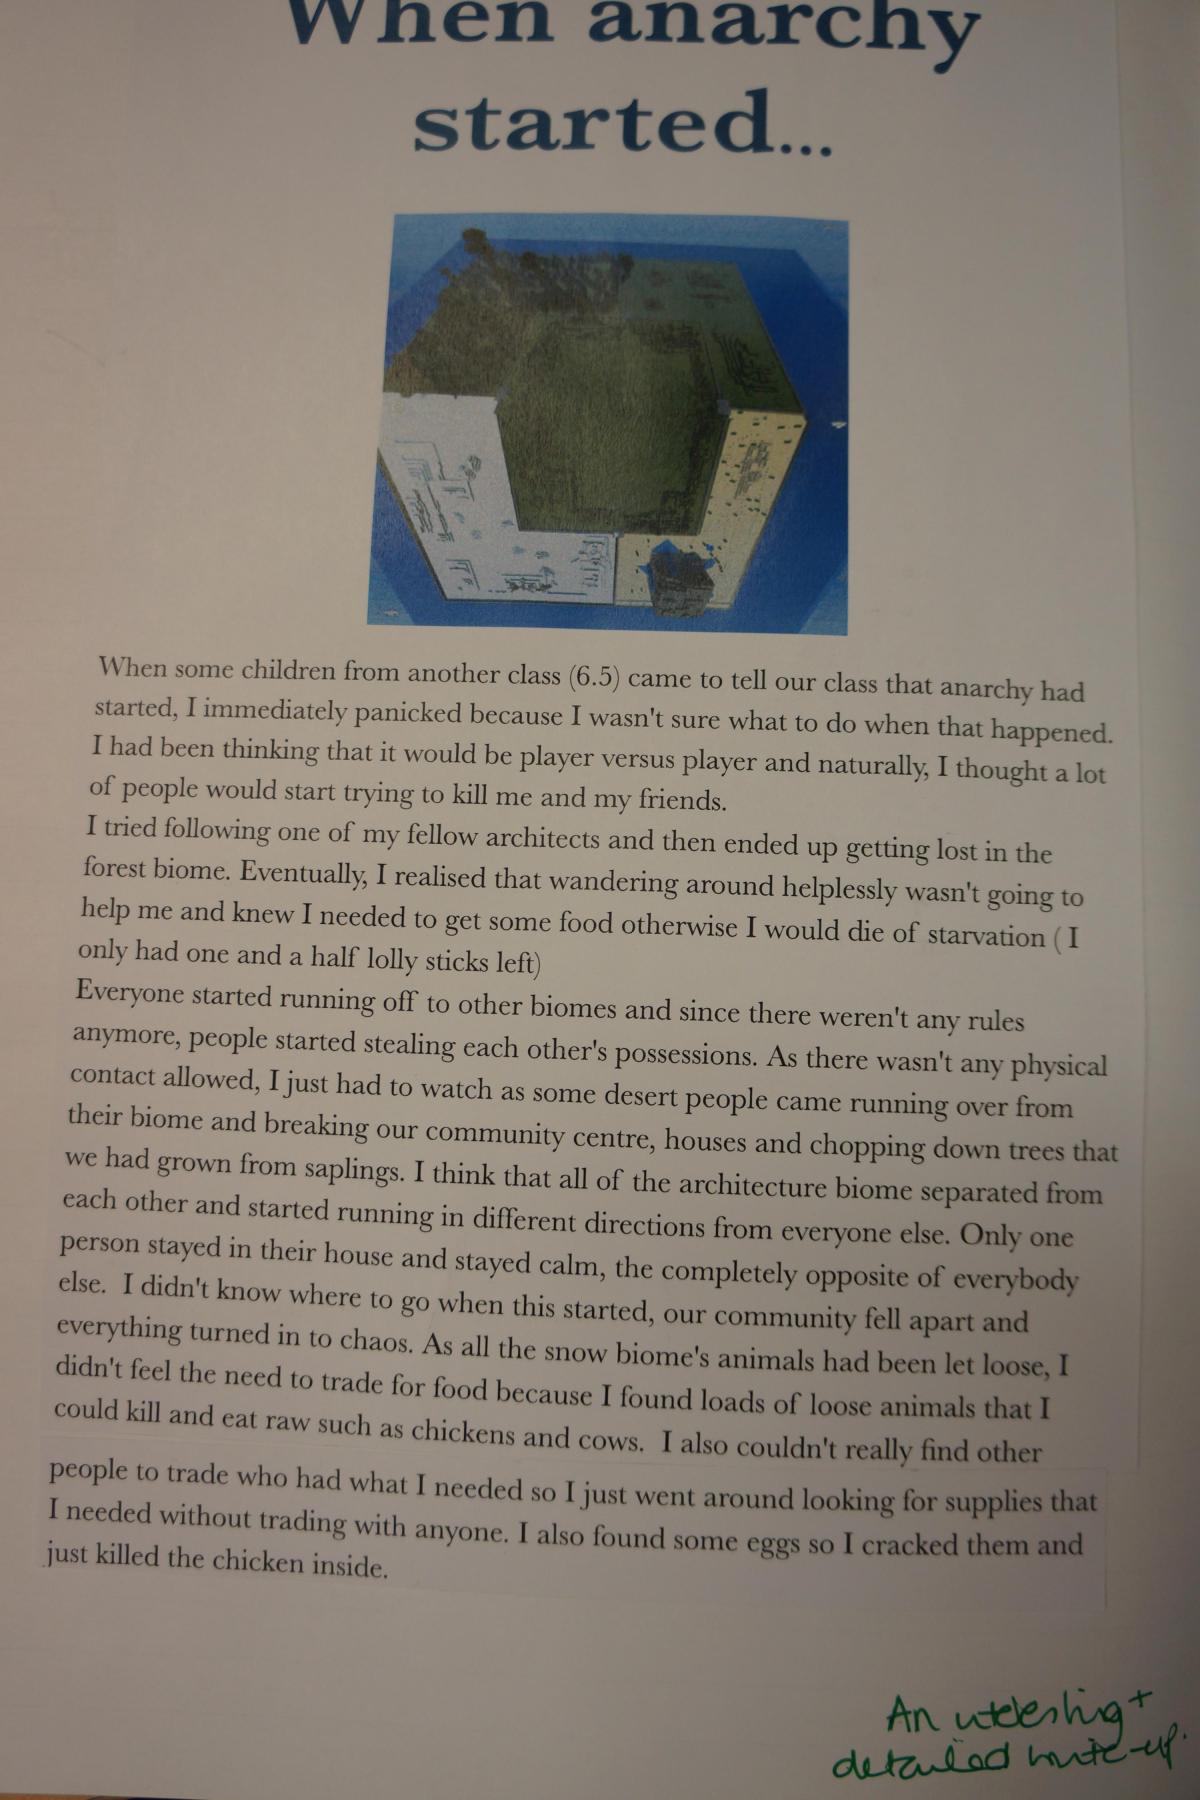
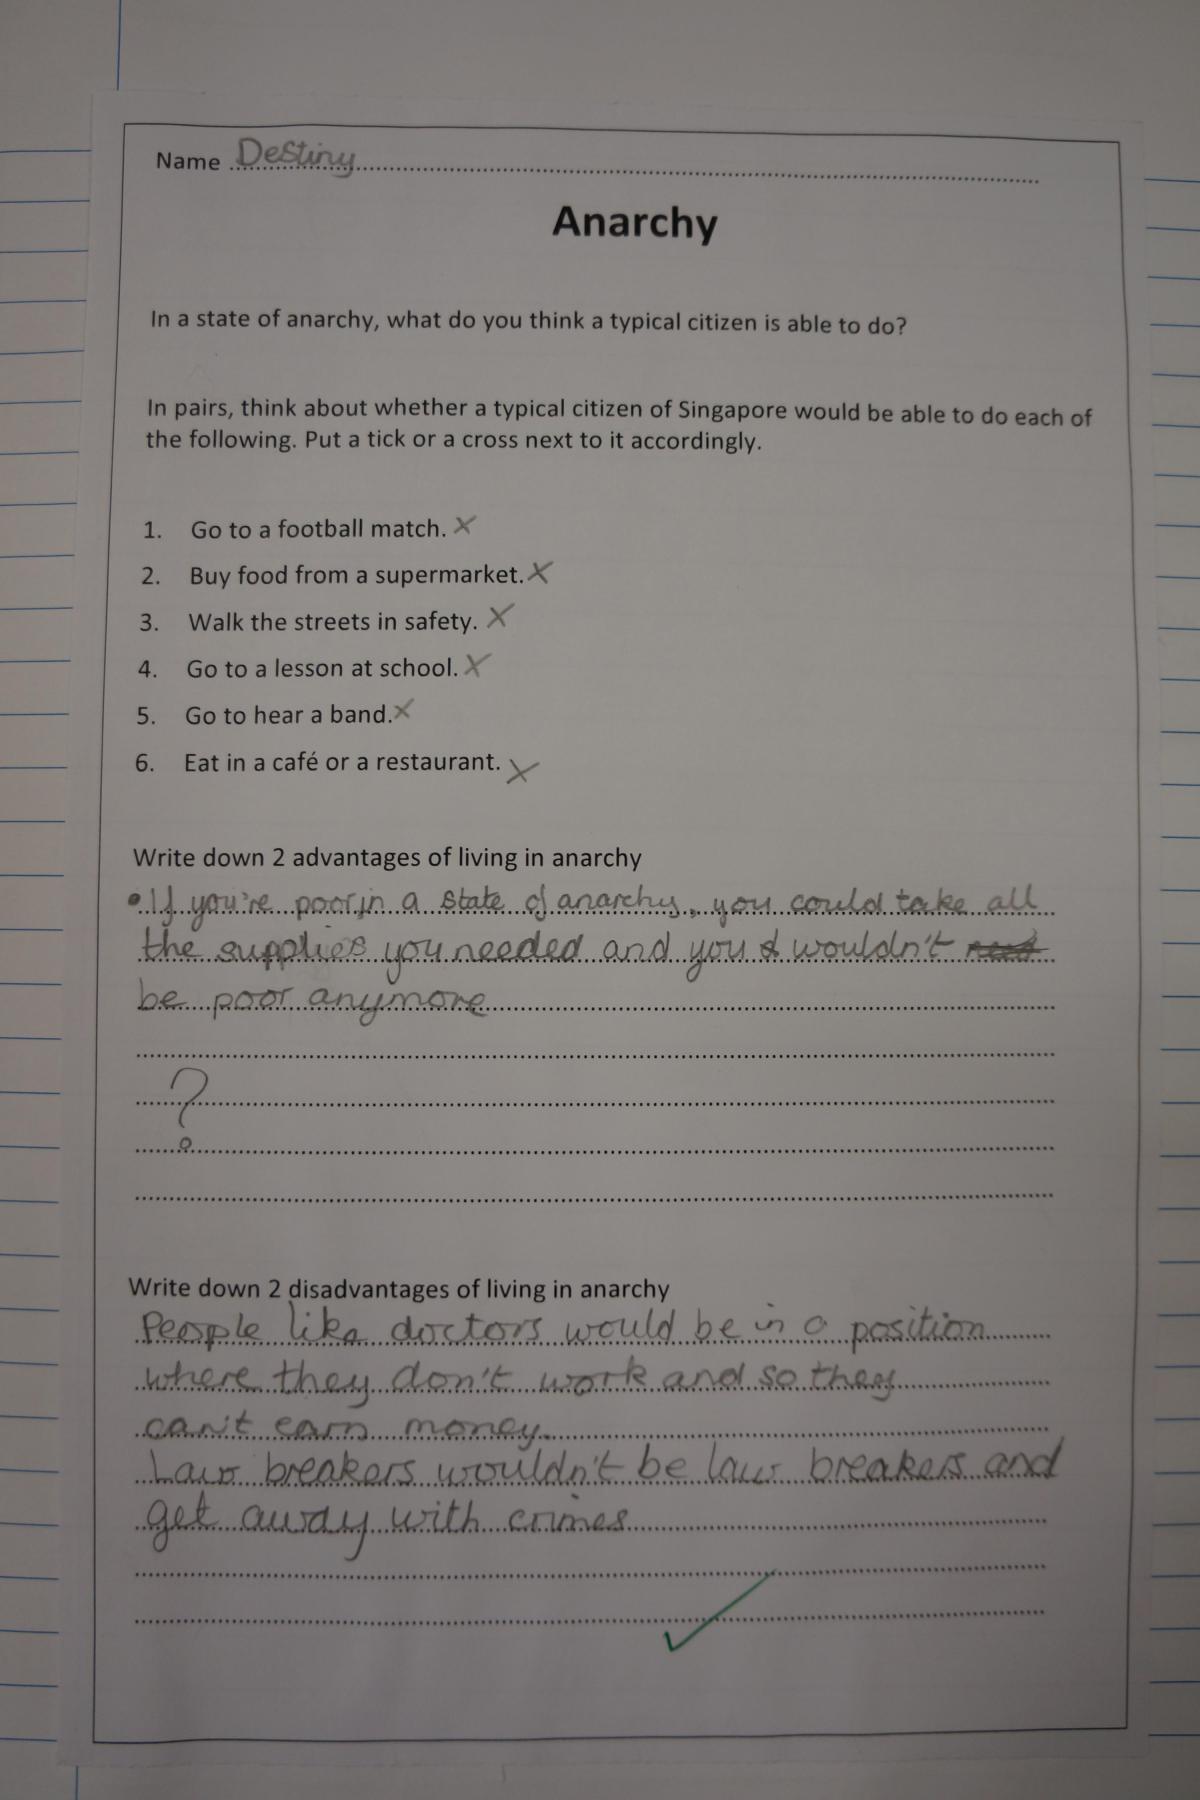
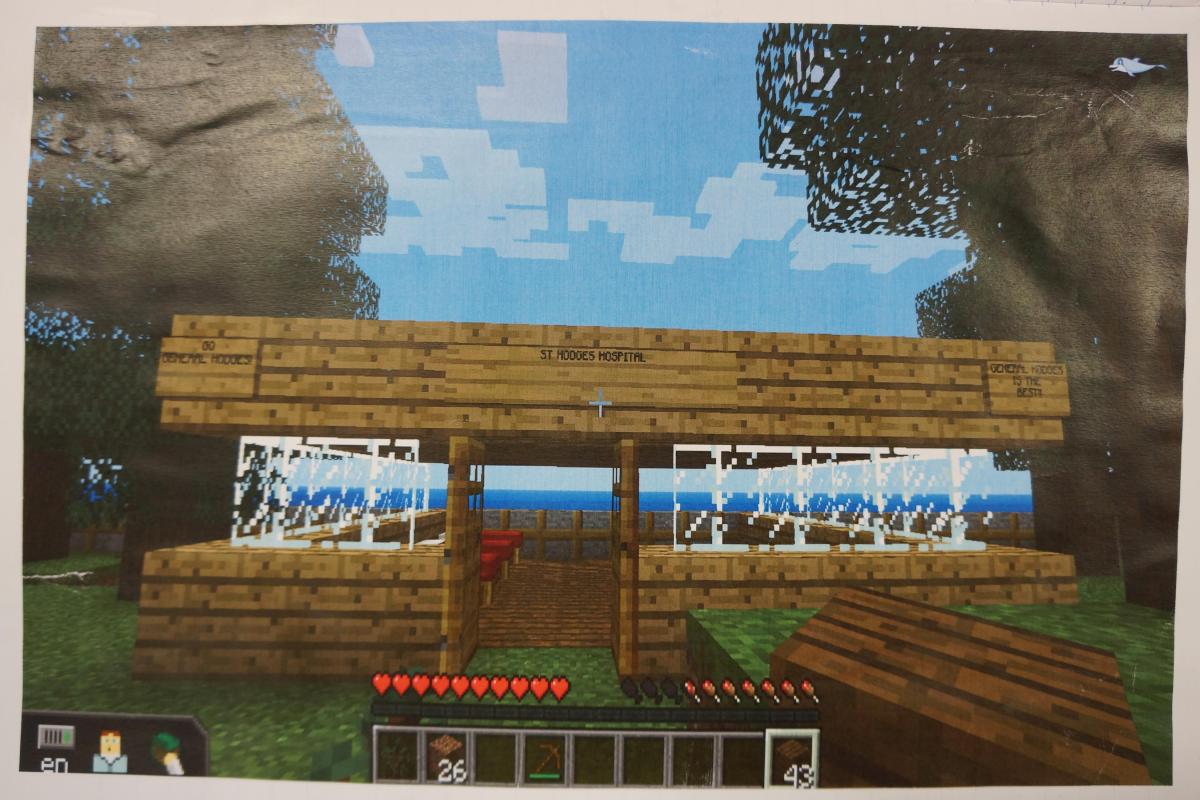
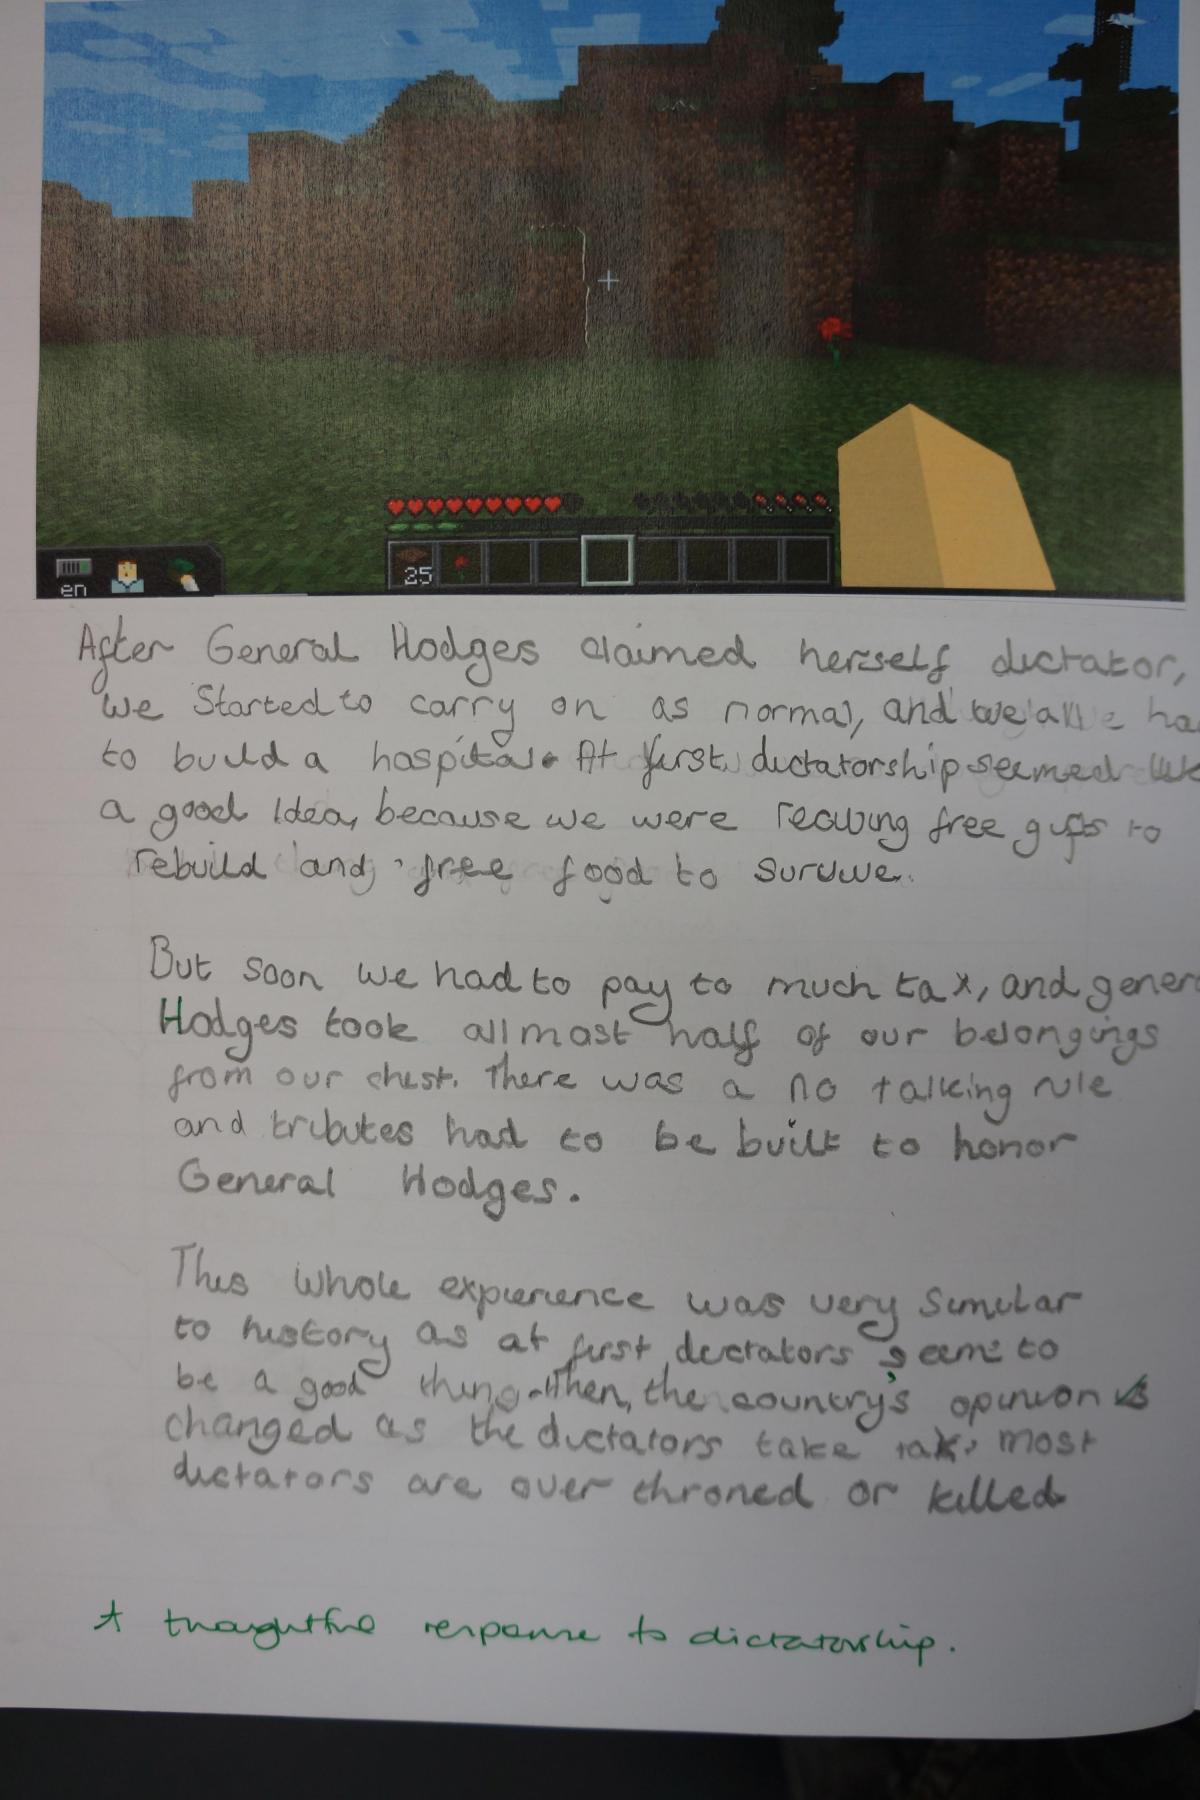
Teaching Governance, anrachy, dictatorship and Citizenship with MinecraftEDU in the Primary School
Primary school teachers, tech leaders, teaching assistants, Minecraft Nerds and Novices.
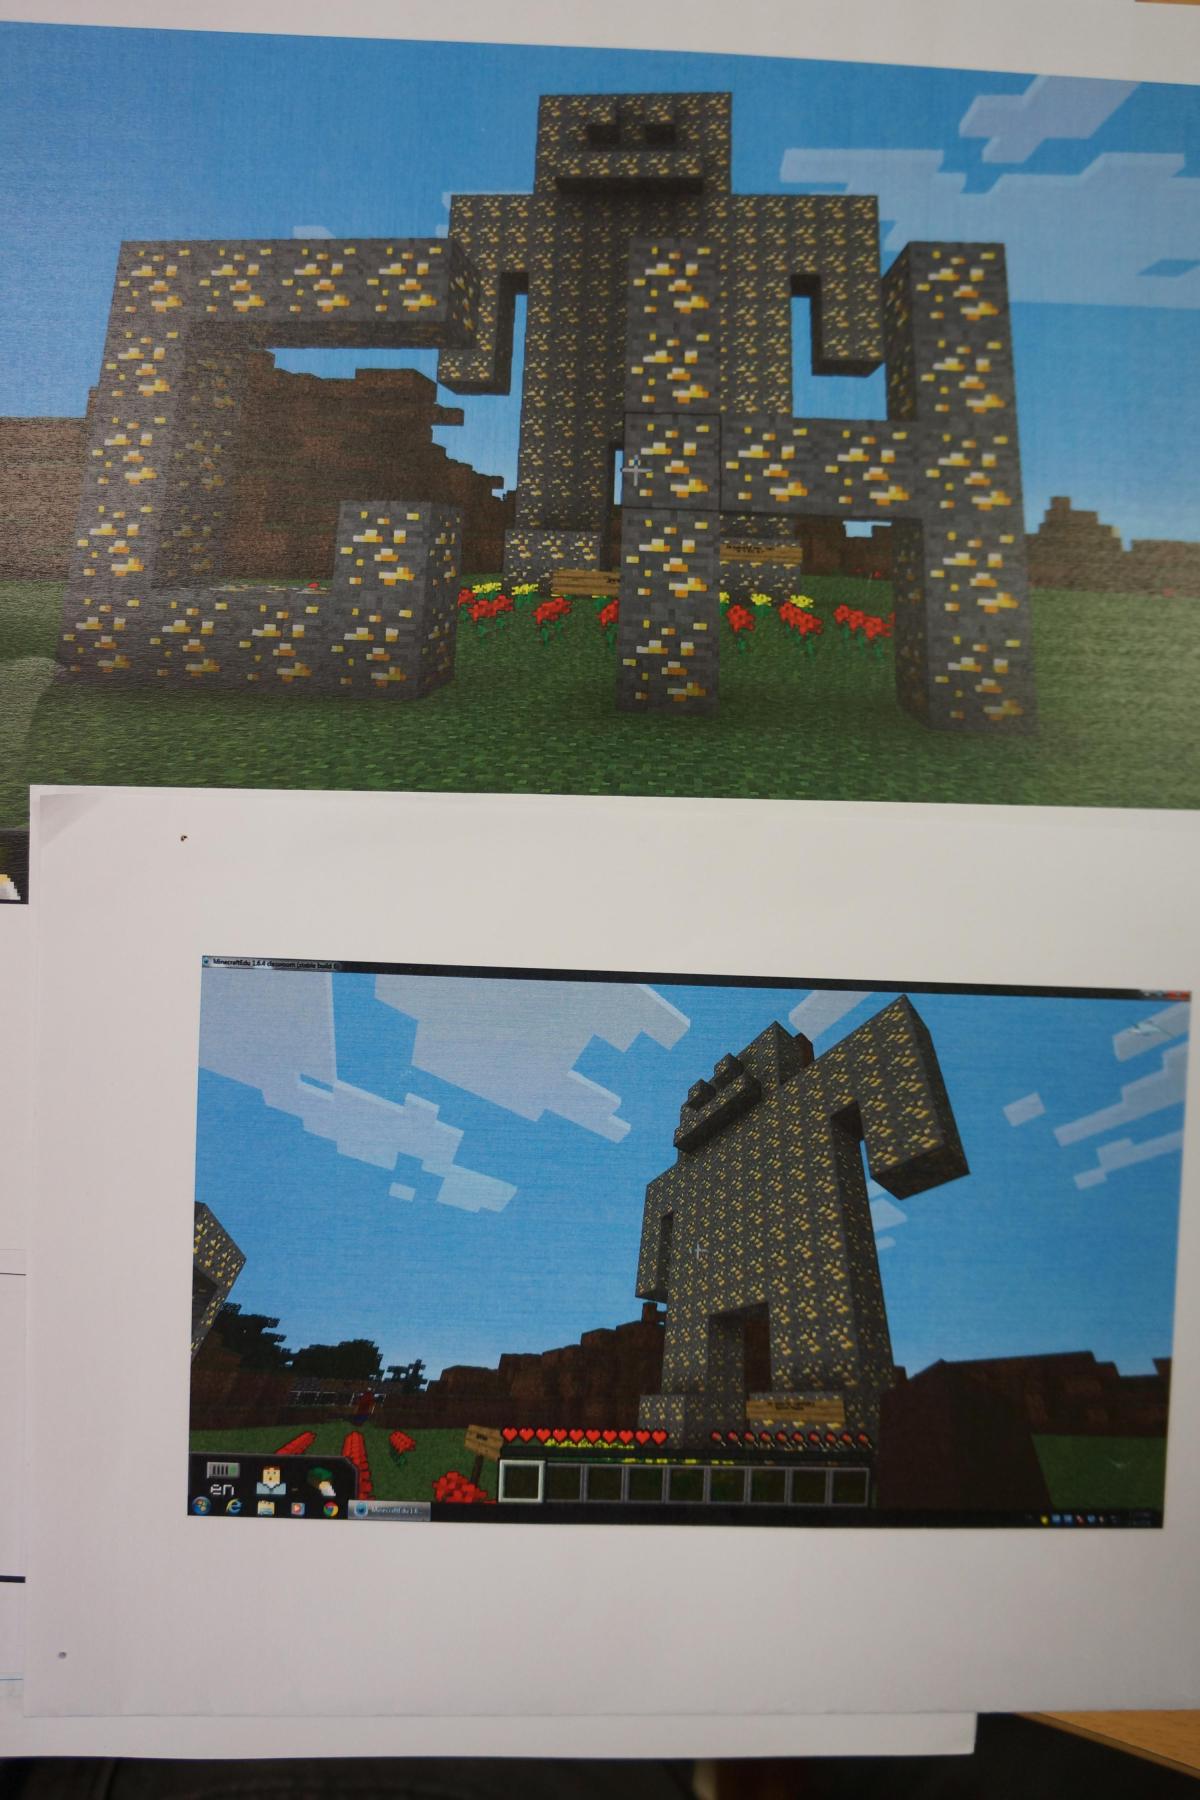
Minecraft is a phenomenon. It draws children in and enthuses them in many ways from collaborative building exercises to understanding how a community works to building apartment-sized working scientific calculators.
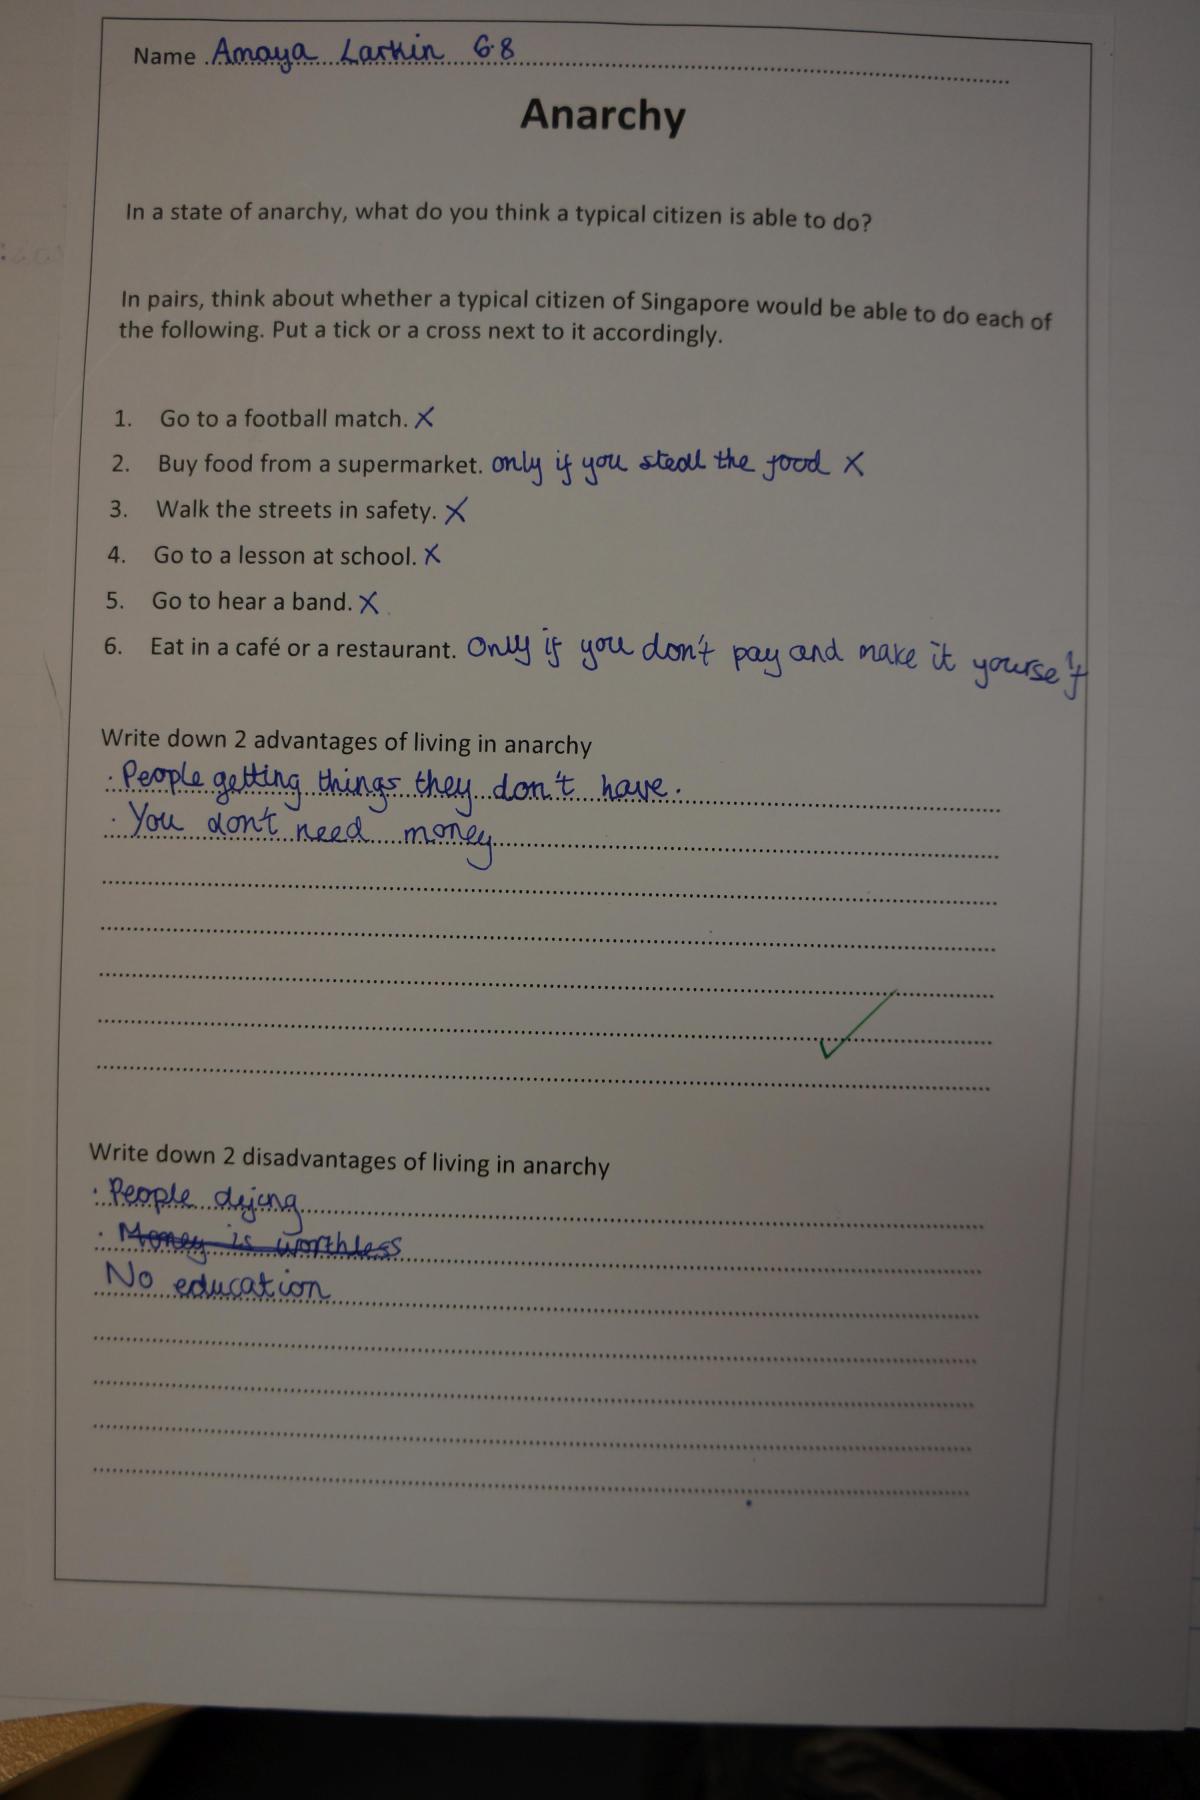
This workshop demonstrates how class teachers (with absolutely no Minecraft experience) are able to control a MinecraftEDU server (in many locations) and teach the topic of Citizenship. The topic is a 3-4 week plan and can be extended in as many ways as you see fit for your school.
A synopsis of what is covered here from our planning:
The students will be able to demonstrate their empathy and social awareness skills as they share and explore how the global community responds and whether, in some cases, a proactive approach to environmental issues should be pursued. Children will understand what we mean by community. To be aware that they are part of the community and therefore have some responsibility within their own community.
You will, as a participant, be able to see that as a complete novice you can run tech-led series of lessons by allowing students to take control of their learning.
You will learn how to use the basics of MinecraftEDU and how to run this in your school.
You will walk away with a series of very detailed plans (written by Nicky please back reference and give credit where you can) and resources to be able to run this topic the very next day in your school.
There will be examples of ready-built worlds (you can design your own of course), advice on pitfalls with in the lessons and our take on what can be improved for the next installment of the topic.
We will also share both parental and student viewpoints on learning about community values and what it now means to them after this topic.
Nicky Hodges is a class teacher, Assistant Head of Year 6 at Tanglin Trust School, Singapore and is a key part of our Technology integration team in the junior school. @nickyhodges3
HOW TO INSTALL MINECRAFTEDU

MINECRAFTEDU FILES AND FOLDERS
The links below take you to the files you need for installing Minecraft at school.
LESSON RESOURCES FOR STUDENTS
LESSON RESOURCES FOR TEACHERS
MINECRAFTEDU INSTALLER
MINECRAFTEDU MAPS

Uploaded by Glenn on 2014-10-02.


FOBIT 7 @ GARDEN INTERNATIONAL SCHOOL KL
This is the 7th FOBISIA Primary IT leaders conference and this time the presentation will be on using the MakeyMakey for students to control their computers via anything that they're making in in topic lessons.
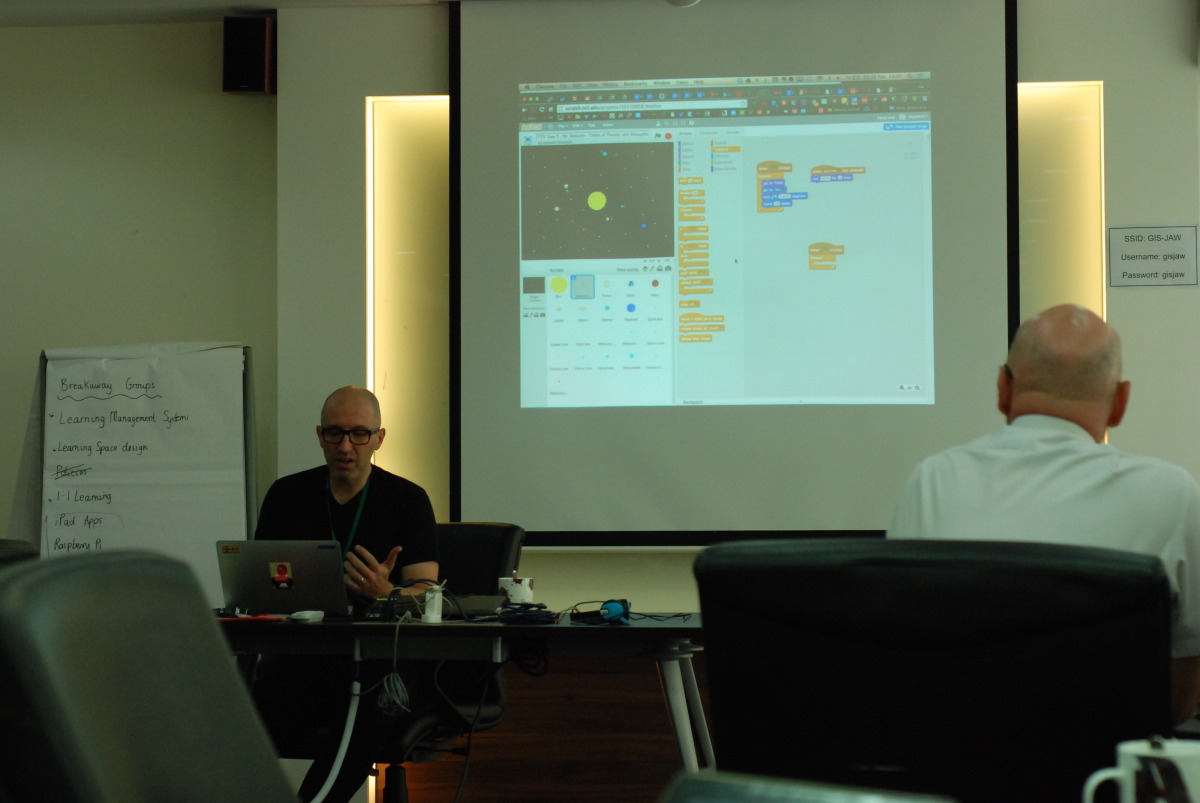
The inspiration for the topic on Space for Year 5 children came about through this project below:
Click on the image to take you to thier download instructions.

Scratch PDF Download
The year 5 children are learning about space and planets and I'd like them to understand something with a little mathematics involved in the movement of the planets. I'd also like them to be able to design their own solar system and not have a pre-made template from me to control as I think this can sometimes take the funout of it a little.
In these time contrained times of teaching in an international school it's very difficult to compete with all the other subjects (Chinese, French, Music, P.E.) that entail running off to specialist lessons. With that in mind and an eye on hindsight I let them build their own.
It's also pertinent to inform you of context. This is a completely new realm for these children - they've never coded, never used Scratch (except CCA children - about 5 out of 200 in the year group) and certainly never seen a MakeyMakey controller. This is why there is little in the way of actual coding from my expectations although from a starting point (let's call this version 1.0) there is a lot of building, conversations and new experiences that, have all the children out of their comfort zone.
Another point to raise here is the children's use of actual IT skills. The community at large are hooked into IE use. This in itself is fine, however I'd like the children to follow a simple mantra: How you approach the Web and your use of the Internet in school should be no different to how you operate them at home regardless of the machine you are using.
The year 5 have never created bookmarks, looked into their Internet history, customised Google Chrome, signed into Chrome or understood how their history can be looked up from home in this way. Also, being an IE centric school, they have never understood why other browsers can show some services and others can't.
The other and more pressing topic is that of community and digital citizenship. All the children are working on projects that require them to sign in and 'see' other children's projects within the studios that the Scratch platform allows. Again, this is completely new to them.
I feel it is crucial for today's students to experience this kind of environment very early on with the likes of Club Penguin, Moshi Monsters, Google Drive, Edmodo or some kind of open platform that promotes discussion in the open for all to see, read and understand people's actions when they edit something. Especially as our students go 1:1 with iPads in Year 6 and with that all the IM services that this opens them up to. They need some kind of scaffolding before they understand what KIK is.
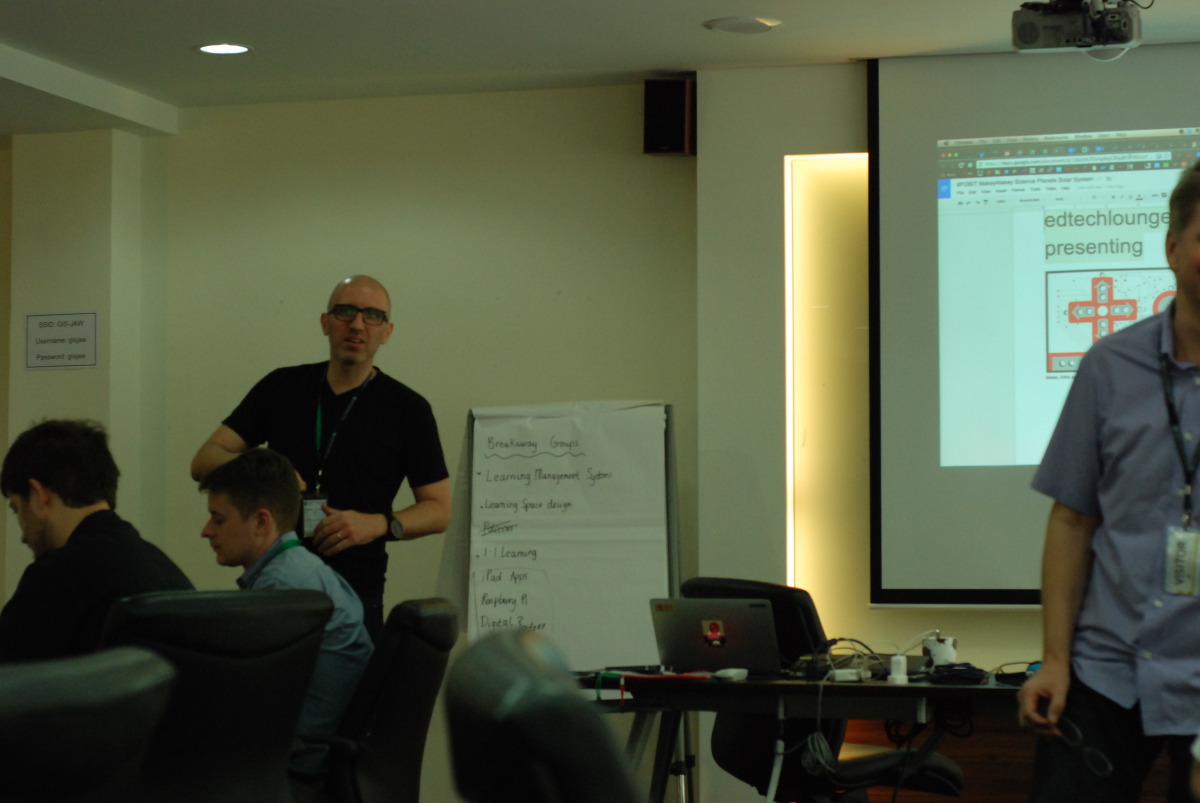
The Presentation:
1. Intro Video.
What we did and why. Précis the above and put the series into context.
2. Share the link: This is the project
3. What is Makey Makey? Hands on.
4. What can you build using the card and pencils.
So, to the series of lessons.
Makey Fun
In this part, as we're building, I'd like to share these with you:
This is one that my old colleague Neil in Brunei (was Vietnam) produced. We don't know why his projects always involve Reel 2 Real.

One more from a MakeyMakey Search on Scratch. Find it here.

Science In Year 5 project using the Scratch project above from Josh Burker

It is expected that all children in my lessons learn to become as autonomous as possible. That exploration and communication is as valuable as leaning instructions from the class teacher.
With that in mind a playlist of all lessons is always handy!


The site we're going to use is scratch.mit.edu here you can make your own 'Apps' that can be embeded into a web page, your blogs or shared with your friends on the Scratch site.
Please log in with the username: ****** and the password: ******* to find out more.
You have a very small homework assignment to do in this session that you have about 2 weeks to complete. Click here to find out how the homework works and what you have to make. I promise it's very simple and won't take longer than an hour to make unless you want to make it look really awesome then that's up to you.
Hey!
Watch this...
Refer to playlist...
It shows you what we're going to be making and how it works. What is Makey Makey? click to find out.
This is what we're going to be making over the next couple of lessons. There is a sequence to what we're going to learn and how we're going to learn it.
1. We're going to find out what Scratch is and how you can play with this at home too.
2. We're going to learn how to make a simple program where the solar system we build and the planets we design act in a similar way to that of the real thing.
3. Then, using your homework pages with the tinfoil strips on the back we're going to make your 'App' become interactive with the MakeyMakey.
4. Once you understand how all this works then we are going to make one independently for the moons of Jupiter - namely Ganymede and Titan that we will assess you on.
All good, creative fun.
Lesson 2
Adding code Blocks
BEFORE YOU BEGIN LESSON 2
You must have all your planets drawn and the lines that follow them. All sprites must be labelled too.
Lesson 2!
Please start on slide number 9.
We're learning to code our sprites.
Video
Lesson 2 - Video 1 ( there is sound - you need headphones)


How to add code blocks and change the values inside them.
1. Add the blocks as shown in the video.
2. When you are done watch the next video and use the website I suggest to get your data.
Lesson 3
Below, for Lesson 3 (Refer to slide show above), you will need to start on Slide 9.
You are learning to fine tune your code.
You will: Code the planets to spin around the Sun.
You will: Place the Sun at the center of your solar system and all planets and planet's lines will orbit this central point.
You will: Find all planet's information and data from: enchantedlearning.com/subjects/astronomy/planets/
In this lesson you should have ALL planets orbiting.
Lesson 4
Today you will use the Makey Makey once you have made your sounds.
Your focus is to make your Scratch App interactive.
To do this you need to type some text and record some spoken words.
Below is a short video to help you with doing this. (How Makey Makey works Video Above)
There are some questions at the end so listen carefully.
Lesson 5
This is finishing off and running an independent task.
The task is to choose any moon from any planet, find out how long (in Earth Days) that planet's orbit is and then find out how long (in Earth days too) and program the moon to orbit the planet as part of the solar system.